Sidebar
Table of Contents
Dish-mounted Biquad WiFi Antenna
In the early spring of 2009, I was looking for a new off-campus appartment with my roommate. We found a great new place, and one of the reasons I selected a specific unit was that I could see several Georgia Tech buildings from my balcony. I reasoned that with the right antenna, I would be able to pick up the campus WiFi and use that in my apartment, instead of paying for Comcast internet (which is considerably slower then our WiFi connection). I had recently seen an article on Engadget about using a biquad antenna with a satellite dish, so I decided to give give it a shot.
Building the Biquad
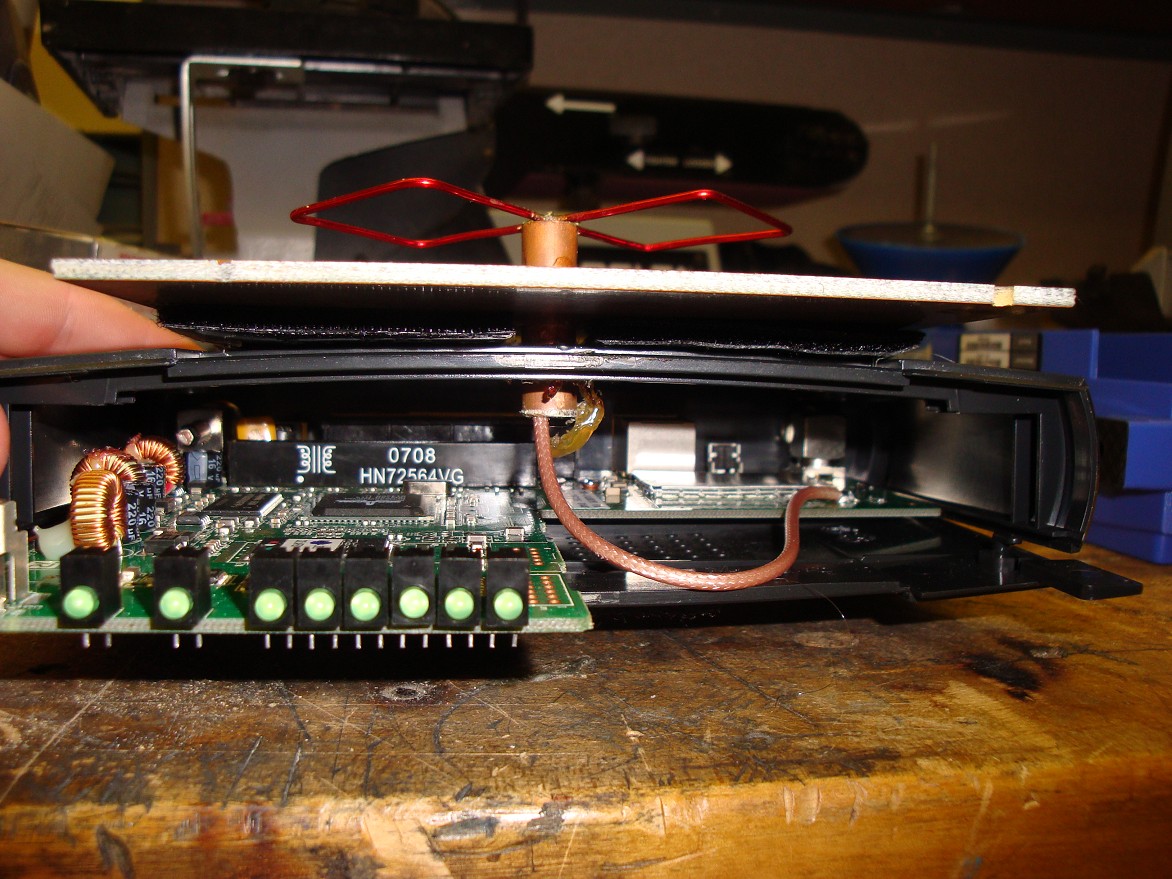
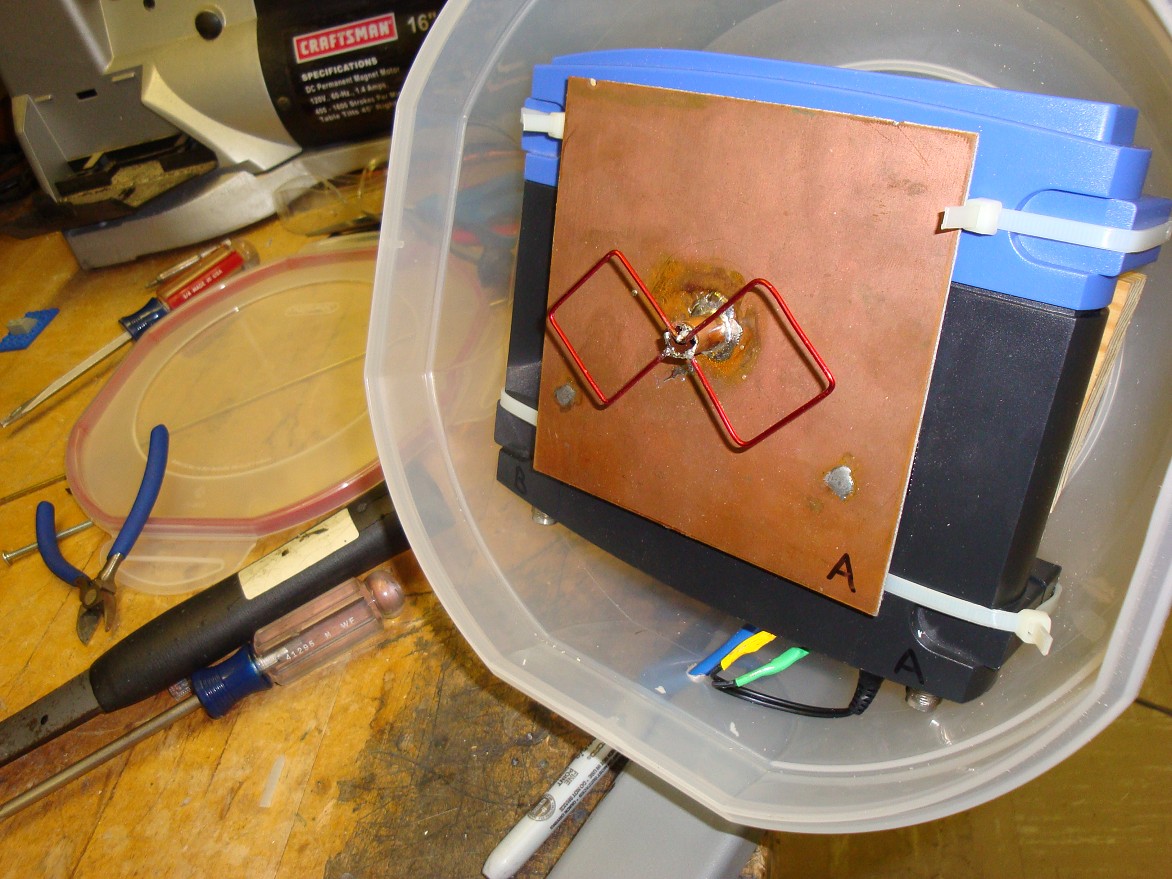
I won't go into all of the details of the antenna, since there are already good tutorials available. However, I did decide to do something a little different. My friend Paul had built a biquad and didn't use anything except the copper clad, the copper pipe in the middle, and the element wire. I'm pretty sure he got them from scrap. Instead of buying some expensive N-connectors, coaxial cables, or wifi adapaters, I just used my WRT54GL router and mounted the antenna directly on the router. No need to buy the cables or connectors, and no worrying about signal loss for each of those components.
As you can see in the middle picture below, there is already an RF cable inside the WRT54GL which connects the diversity chip to one of the antennas. I simply cut this cable at the antenna connector, stripped the cable, and connected it directly to the biquad antenna element. Do not desolder or do anything to the area where the cable connects to the PCB. This is RF, and messing with it can give you some serious signal loss. Of course, now the router itself has become an antenna, which means it needs to be outside to get the signal. However, I feel this will result in better signal strenth, instead of worrying about bringing a coax cable inside and dealing with that signal loss. Plus, it was way cheaper. I didn't need to buy anything
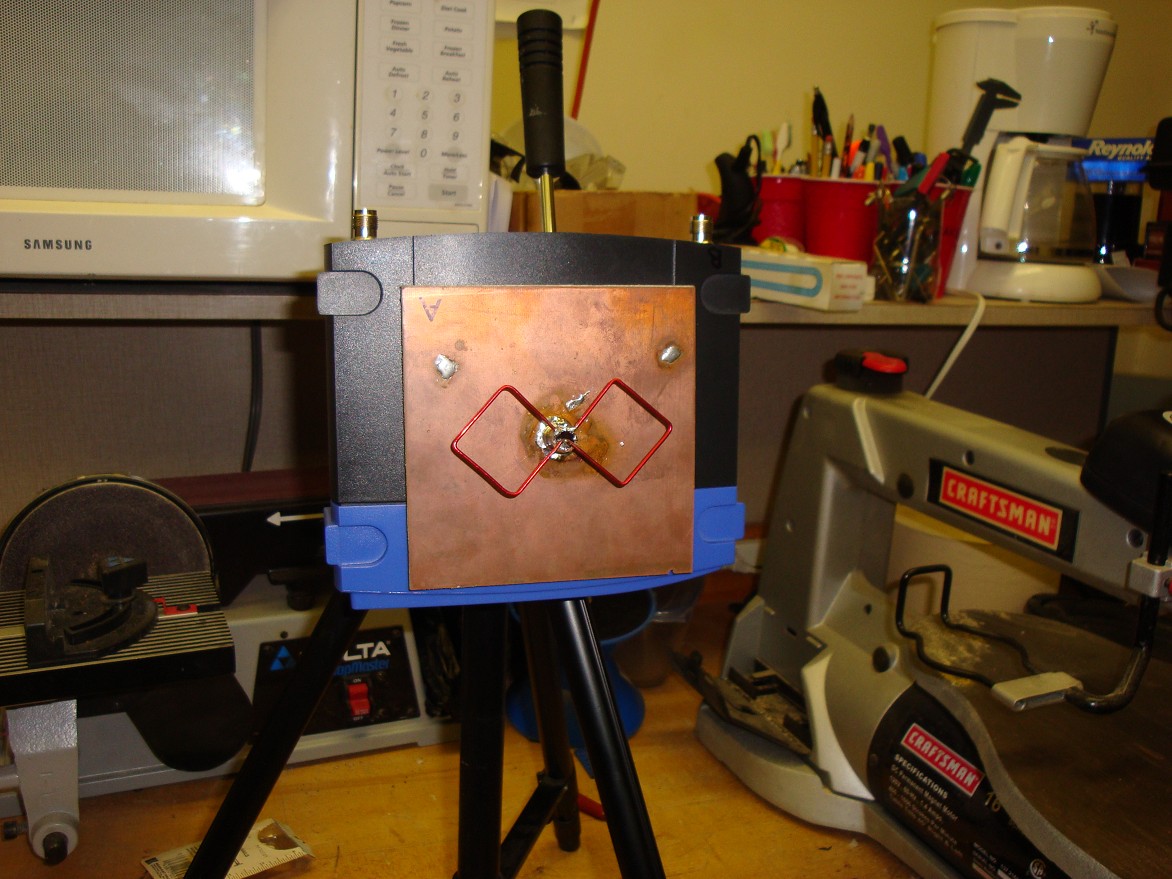
I installed the Tomato firmware on the WRT54GL and configured it to use only the antenna A (the biquad) instead of both antennas. From there, it was easy to use the site survey to verify that I could pick other WiFi signals. I just needed to test the range.
I mounted it to a camera tripod and took it over to my new apartment (haven't moved in yet, just testing). I set it up and it actually worked perfectly. I got a great connection to the campus WiFi, just by pointing the antenna in the general direction of the building. However, my work wasn't complete. I needed it to be weather-proof, and I wanted it on a dish. Obviously I didn't need to put it on a dish at this point, but I figured, why not?

Assembling the Antenna and Dish Mount
My plan was relatively simple. I would put the antenna/router inside a water-proof plastic container, then attach it to the end of the dish aiming at the focal point. I'd also have to build some way to hold the dish up, since I only had the dish itself, no mount. I would also run power through the ethernet cable so that I would only have to run a single ethernet cable to the dish.
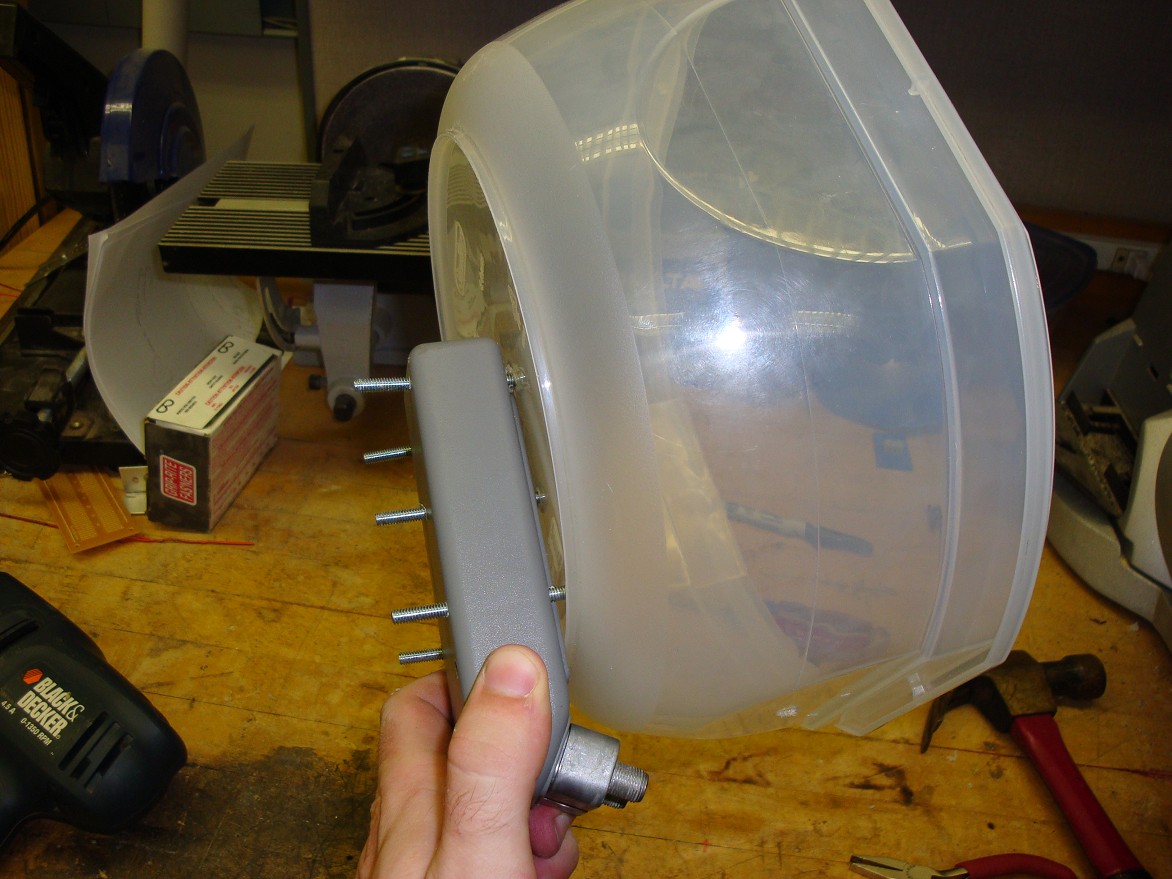
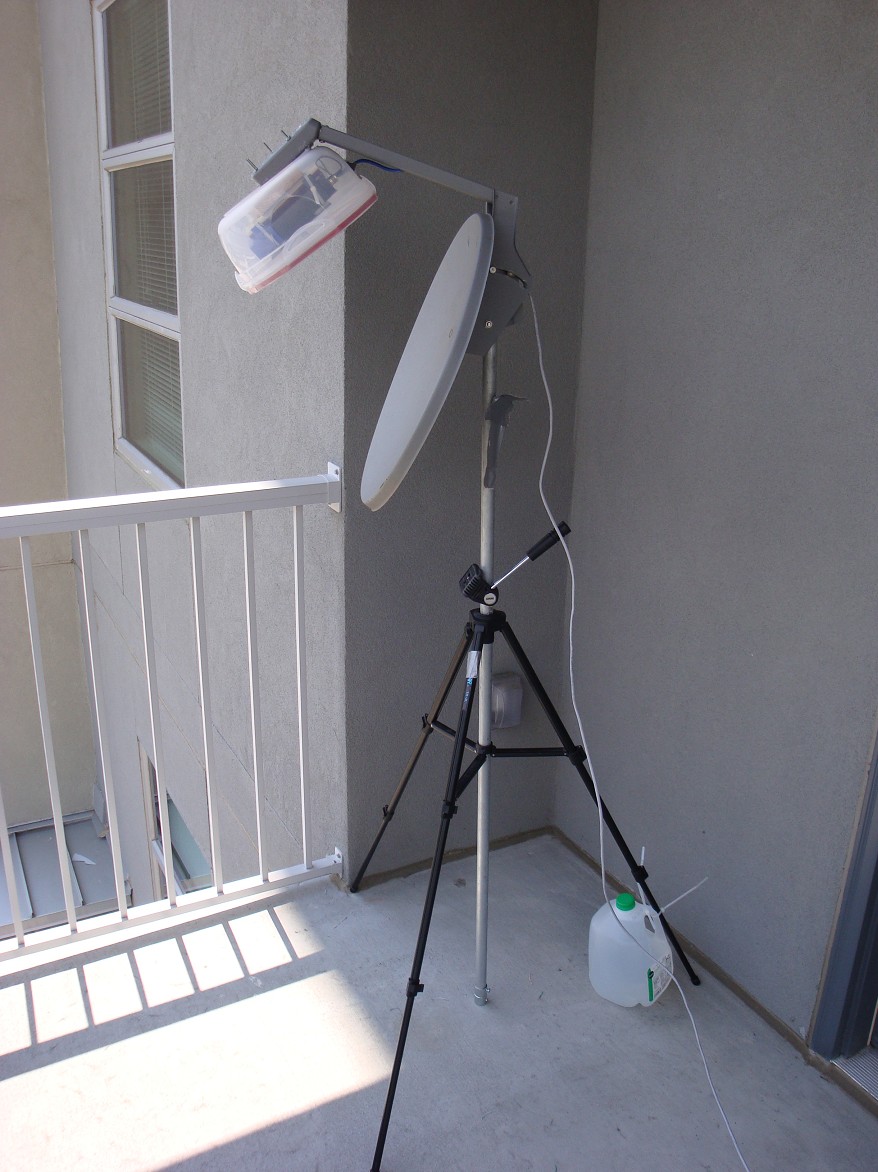
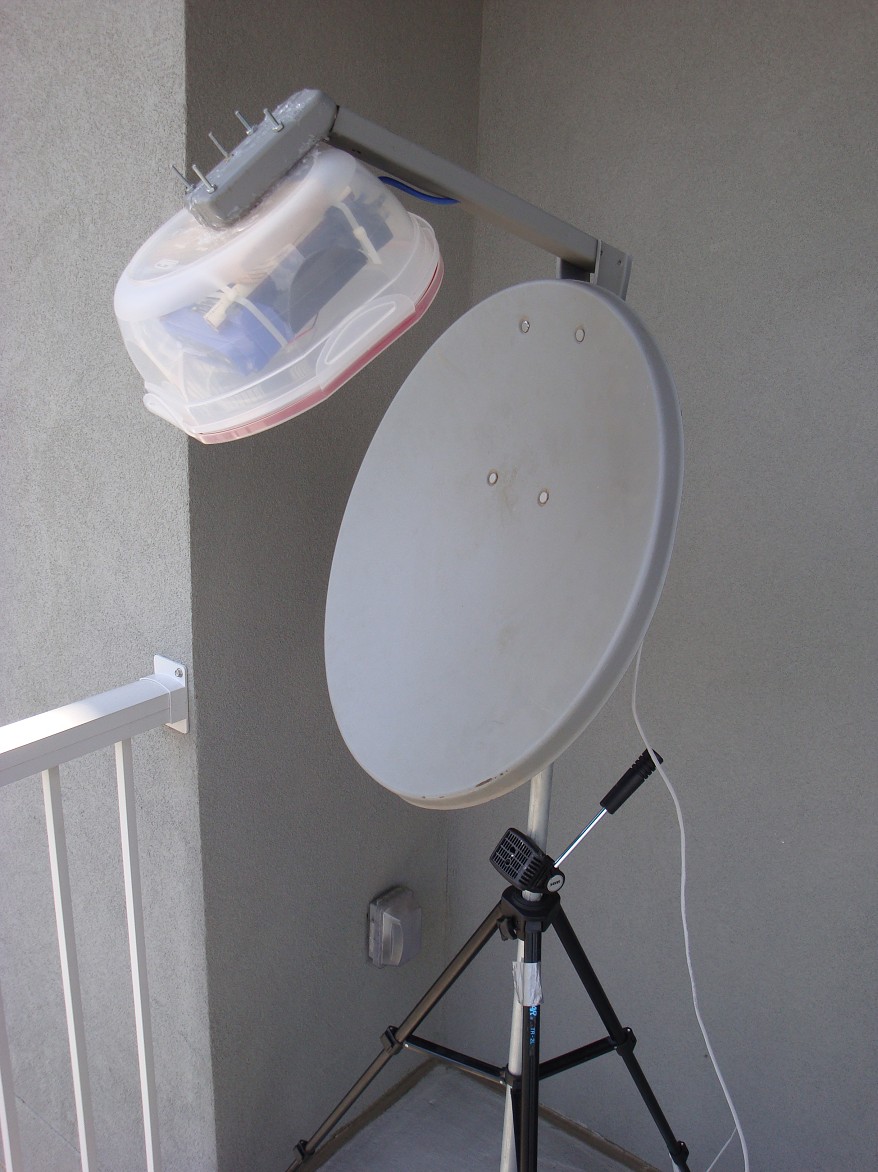
I started with a basic home satellite dish that my friend happened to have and no longer needed. I cut the feedhorn off with a hack saw, and verified that my plastic bin would would fit on the end. I used a drill press to put about 5 holes in the old feedhorn mount, then put matching holes in the bin. I was mount the router inside the plastic bin another way, but realized I could use the existing holes. So I cut a block of wood so that it would fit inside the plastic bin, and drilled more matching holes. From here, I put screws through the wood, bin, and feedhorn mount, and locked them off with nuts. I then nailed two pieces of PVC pipe to the wood so that the router would sit nicely on them. After adding some duct tape to the PVC so it wouldn't slip, I just zip-tied the router to the PVC pipes. The pictures should make this description a little easier to understand.
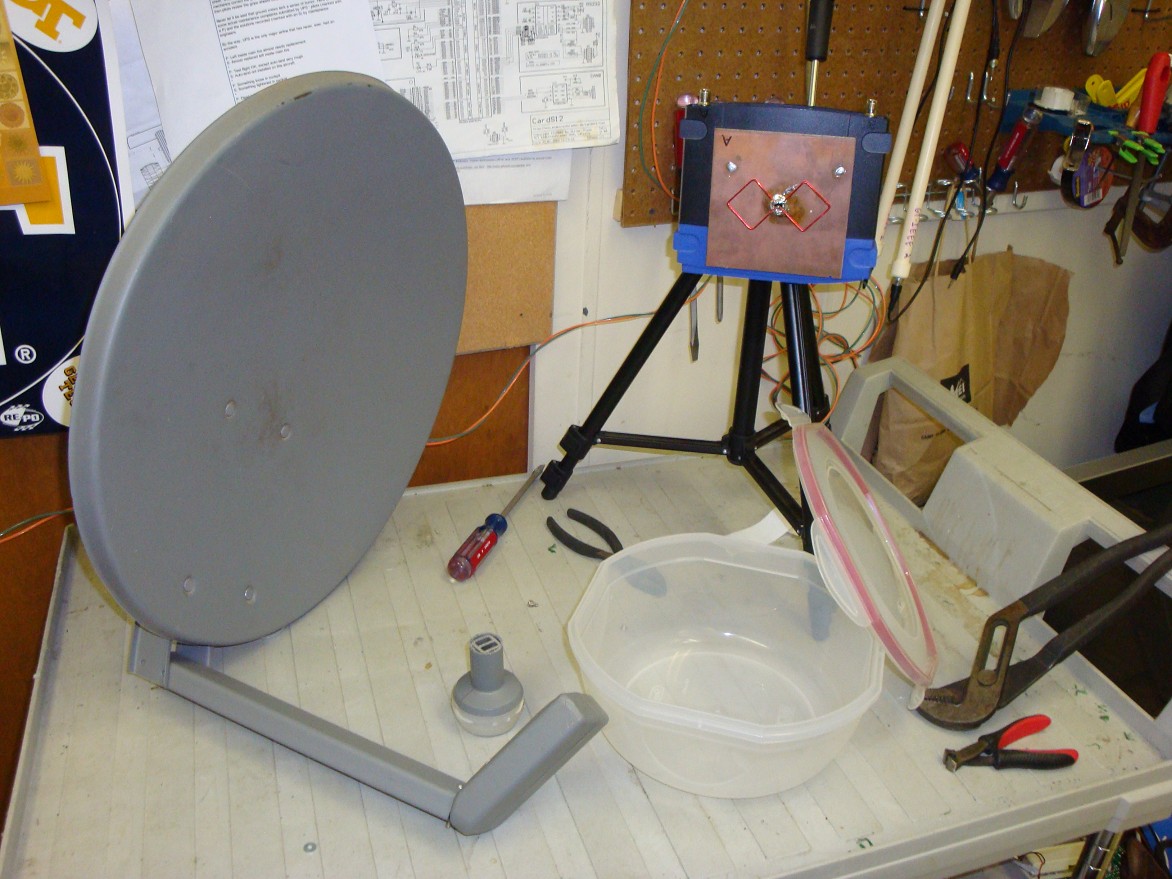


I was lucky with the mount, I just happened to have the right materials. I had a metal pipe that was pretty sturdy, and a camera tripod with a center pole the exact size as the metal pipe, so I was able to take apart the tripod and use that for balance on the pole. The assembled dish looked pretty awesome, but I soon realized the angle was all wrong. Cheap home satellite dishes aren't perfect concave dishes that reflect everything into the center; instead they are elongated and point more upwards. Not ideal, but instead of aiming the dish downwards (and messing up the balance of the already top-heavy assembly), I just turned the dish upside down. So now it points downwards, and with the right adjustments, the signal is directed completely horizontal.
Successful Long-Range Internet Access
After getting the keys to my appartment, the first thing I did was set up the dish. I had an incredibly annoying issue getting ethernet and power connectivity working, and it turned out I actually just crimped a cat5 cable wrong. But once I fixed it and aligneds the dish, it's been smooth sailing. My internet has been rock solid. The signal quality does vary quite a bit (varies from 7 to 27 in signal quality, or roughly -70 dBm to -85dBm), but I haven't ever had it “cut out” or loose connectivity. It might be because a tree is in the way. Regardless it works great, and I have amazing speeds, around 6mbs up and down.
I did end up using a 2 gallon milk container full of water to anchor the dish, so it's very steady. There was also some moisture accumulation inside the plastic container after the first night, so I sealed all the holes with silcone sealant. Since then, the dish has survived multiple heavy rainstorms, including some with severe wind. I didn't loose internet during the storm, nor did I need to re-align the dish!
And that's it! Totally free internet (well, not including the student fees I already pay…) for my new place! If you have any questions or comments, feel free to send me an e-mail.
Check out the next stage of this project.
Writeup: April 2009
Page Tools
