Table of Contents
I2S Audio DAC + Amp for Raspberry Pi 2 / B+
I began planning for another portion of my security system, and I wanted the new audio subsystem to based on a Raspberry Pi. Everyone knows that the sound quality from a Raspberry Pi's 3.5mm audio jack is less than stellar - it's just PWM through an RC filter, not a true DAC. To get higher quality audio, I considered a few options. The obvious choice is to get a generic USB sound card. They make plenty of cheap, small modules that plug in to USB and have 1 analog output and 1 analog input. I started down the path of making my own USB sound card / DAC based on the PCM2707, but soon realized that there was an even better way: I2S audio.
There's a whole world of audio equipment for the Raspberry Pi, including several DAC's and amplifiers. My favorite DAC's that I looked at were the HiFiBerry DAC+ and the Pi-DAC+. Both designs use the PCM5122 DAC from TI, a power regulator, connectors and not much else. Ultimately I wanted to use these in a highly integrated device, so I figured I could build my own. I also needed a small amplifier to directly power a speaker, so this seemed like a good opportunity to build a small PCB.
Hardware Design
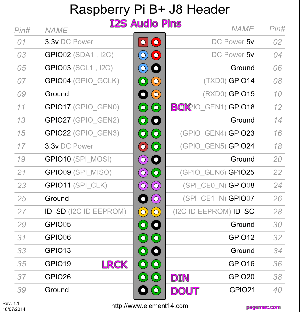
The PCM5122 uses I2C to control the device, and I didn't really want to mess with that on my first attempt. Instead, I opted to use the PCM5102A. This device uses hardware pins for control, and I found this design by WallaceIT on the Raspberry Pi forums. Between that schematic and the PCM5102A datasheet, I was able design most of the schematic. Unfortunately, I was only able to find I2S pinout information for the Raspberry Pi Model B. Since the Model B+ arrived, the I/O pins for I2S audio moved, but I had a tough time finding the correct pinout to connect to the model B+ or Pi 2. I just threw a header on there and decided I'd figure it out later.
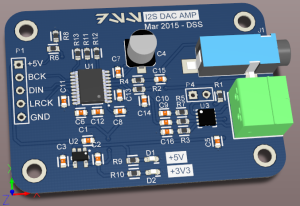
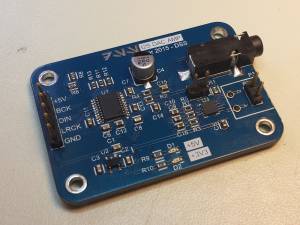
My design also called for an audio amplifier so I could connect this device directly to a speaker. I used the TPA2006D1 from TI. I've used this family of amp on my serialMP3 project. As with the serialMP3, the stereo output from the DAC is mixed to a single channel right before the audio amplifier. A speaker can be connected through terminal blocks or a standard 0.1“ header. There's also a 3.5mm audio jack connected before the amp.
The board requires only 5V power to operate. I used a TPS73133 LDO to generate 3.3V for the DAC. This LDO has really good noise characteristics for the DAC.
Raspberry Pi Setup
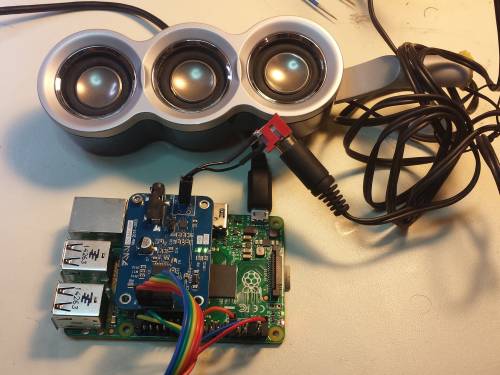
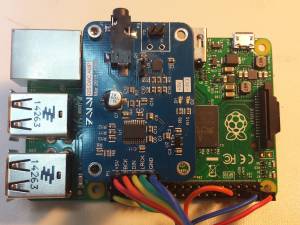
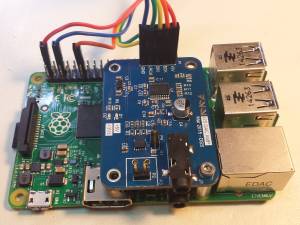
I2S requires 3 digital pins: the bit clock (BCK), the word clock or left/right clock (LRCK), and the data line (DOUT). All 3 of these pins are located on the main I/O header, J8. I used jumper wires to connect my Pi to the I2S DAC board.
Disable onboard audio
First, the onboard audio driver on the Pi needs to be disabled. This can by done by editing /etc/modules and commenting out the snd_bcm2835 module.
sudo nano /etc/modules
# snd_bcm2835 # comment out this line to disable onboard audio
Setup I2S Driver
Next, we need to configure the Pi to use the PCM5102A by adding it to the device tree in /boot/config.txt.
sudo nano /boot/config.txt
Add the following lines to the end of the config file:
dtoverlay=hifiberry-dac
This is the driver for the HiFiBerry-DAC, which also uses the PCM5102A.
Create config file
Next, we need to create an also configuration file. Create the file /etc/asound.conf and add the code below.
sudo nano /etc/asound.conf
pcm.!default  {
 type hw card 0
}
ctl.!default {
 type hw card 0
}
Finish
Now reboot and connect the I2S DAC.
sudo reboot
Test it!
Make sure the driver was installed successfully by running aplay:
pi@raspberrypi ~ $ aplay -l
**** List of PLAYBACK Hardware Devices ****
card 0: sndrpihifiberry [snd_rpi_hifiberry_dac], device 0: HifiBerry DAC HiFi pcm5102a-hifi-0 []
Subdevices: 1/1
Subdevice #0: subdevice #0
I tested on a Raspberry Pi 2 Model B:
Linux raspberrypi 3.18.11-v7+ #777 SMP PREEMPT Sat Apr 11 17:30:37 BST 2015 armv7l GNU/Linux
Playback and Performance
You can use aplay to play audio files, although you probably want to use mplayer since some audio formats are natively supported by the driver.
The I2S DAC AMP works great! The only annoyance is that there is no hardware volume control. Volume can be controlled in software, like within mplayer, but you can't adjust the system volume using alsa. I see now why others used the PCM5122. I'll probably make another design soon using the PCM5122.
Downloads
PCB: March 2015
Writeup: May 2015
